- Home
- Chocolate
- Chocolate Christmas Candy
- Tempering Chocolate
Mastering the Art of Tempering Chocolate
Ensuring Perfection Every Time

Ah, the art of tempering chocolate—an essential process to guarantee your chocolate candy boasts a firm exterior, a stunning finish, and that satisfying, crisp snap!
Though tempering may demand a tad more time during the melting phase, the end result is well worth it. Not only will your candy resist that undesirable stickiness, but it will possess a professional, first-class allure.
Tempering your chocolate transforms it into a dark, glossy, and firm surface once it solidifies. Often, inquiries pour in about achieving that coveted chocolate "shine," and behold, tempering holds the key.
This technique works its magic just as splendidly with white chocolate, offering a delectable taste and appearance. The golden rule of tempering is to never let the chocolate's temperature exceed 115 degrees Fahrenheit. In fact, even when casually melting chocolate for dipping or molding, steering clear of temperatures beyond this is prudent to avoid "burning" the chocolate and altering its texture.

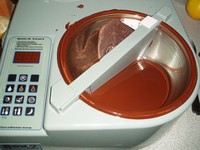
This caution holds especially true for chocolate connoisseurs venturing into candy making beyond the casual realm; a reliable tempering machine may be a worthwhile investment down the chocolaty path.
I haven't gone that far yet, but if I ever decide to start selling my own chocolates, I will definitely consider it.
Guidelines For Tempering Chocolate
Here are some (hopefully) easy-to-follow instructions for making tempered chocolate.
Step 1
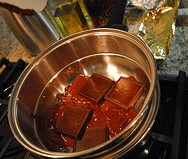
Begin by grating or finely chopping your chocolate. Take 2/3 of the chocolate and place it in the top pan of a double boiler. Melt the chocolate diligently over hot, but not boiling, water.
Be to careful to ensure the water doesn't touch the bottom of the upper pan. Bring the melted chocolate to a temperature of 105 degrees Fahrenheit on your trusty candy thermometer, or just slightly above.
Step 2
Remove the double boiler from the hot water and set it on a dry towel or cooling rack. Stir in the remaining chocolate, maintaining a continuous stirring motion until it's fully melted.
Step 3

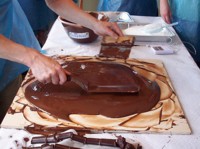
Pour the melted chocolate onto a cooling surface, such as a pastry marble or even a trusty cookie sheet. a metal spatula or pastry scraper to scrape and stir until the chocolate cools to approximately 82° F.
Reheat it gently to reach 88-90°F (31-32°C) for dark chocolate with no milk content and 86-88°F (30-31°C) for milk chocolate.
Please note: Some people prefer to skip this marble slab step because it's a bit messy. They feel they can get just as good results (with some practice) by just continuing to stir the chocolate until it reaches the final tempered stage:
88-90°F. for dark chocolate
86-88°F. for milk chocolate
80-82°F. for white chocolate
If you want to give that a try, go for it, and let us know how you do!
Step 4
Now, let your creativity flow! Utilize this tempered chocolate for your chosen recipe. Maintain the chocolate at its ideal temperature throughout the candy-making journey. Be vigilant, adjusting the temperature as needed until your delectable masterpiece is complete.
Here are a couple of extra tips to help you hold your chocolate's temper:
- Place the tempered chocolate over a pan of warm water about 2 degrees hotter than your chocolate.
- Place your pan of chocolate on a heating pad on low temperature.
- Stir the chocolate occasionally while you are working with it, to keep the chocolate on the sides from cooling and going out of temper before you finish using it.
Tempering chocolate does take extra time, but you will be very pleased with the quality of your finished candies. They will be absolutely beautiful! Enjoy!
- Home
- Chocolate
- Chocolate Christmas Candy
- Tempering Chocolate


New! Comments
Do you have something to add or just want to say hello? Leave me a comment in the box below.